The broadfork is a tool used to break up the compacted soil and to improve aeration of the garden soil. That means it increases the biological life of soil by helping the air and water get into the soil. This tool also allows you to unpack the soil without mixing the surface soil and the deeper soil. It also is known as U-fork or grelinette.
Basically it is an essential tool for gardening. But why you spend money if you can build it at home.
Here I explained in detail with illustration how to make a broadfork.
Tools You Need
| Items | |
|---|---|
| Bosch Angle Grinder | |
| Yost LV-4 Home Vise | |
| BLACK+DECKER MAX Cordless Drill | |
| ARC Welder | |
| GREAT NECK Hacksaw | |
| Screwdriver and Nut Driver | |
| Metal Screws Assortment Kit |
1. Gather the Materials You Need
To make your broadfork, get the following items:
- A hollow bar or steel tube 50 cm long and about 3 cm square if the bar is square (or 3 cm in diameter for a tube) to form the head of the broadfork;
Good to know: The handlebars of an old bike can be used as a hollow bar.
- 5 steel bars 20 cm long and 1 cm in diameter which makes up the teeth;
Good to know: The steel bars must be rigid enough to sink into the ground, and flexible enough not to break on buried rocks.
- 2 steel tubes about 10 cm long and of a diameter corresponding to your two wooden handles;
- 2 wooden handles.
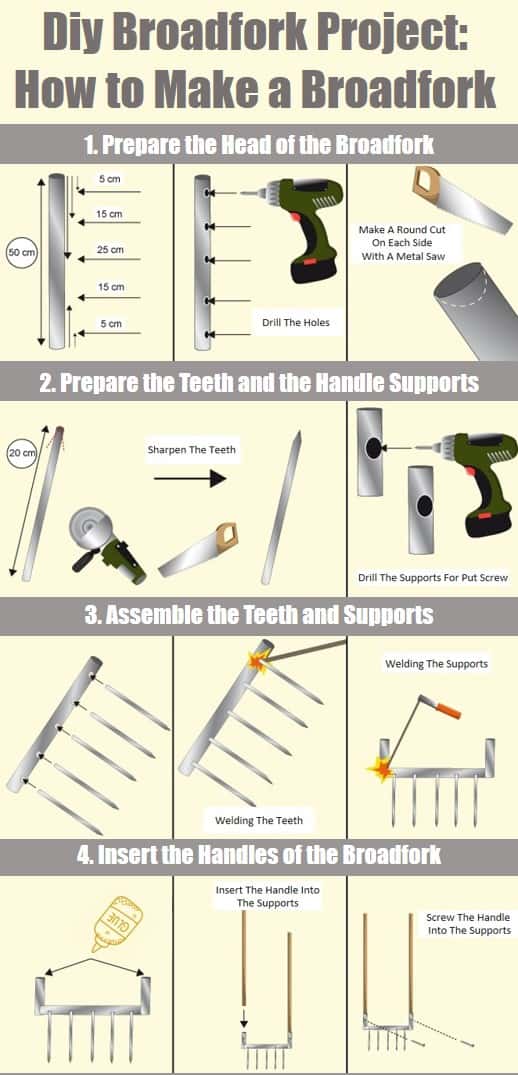
2. Prepare the Head of the Broadfork
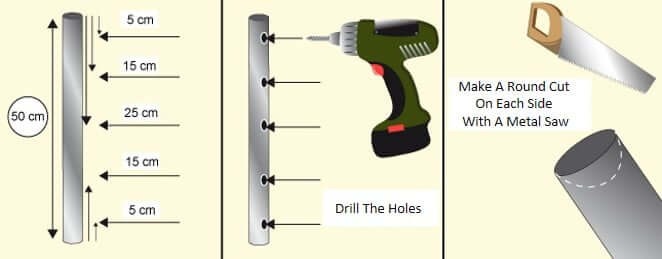
- Place your 50 cm hollow steel bar in a vise.
- Locate the location of the 5 holes to be drilled on the bar for the teeth of the broadfork:
- Two to five centimeters from each edge;
- Two to 15 cm from each edge;
- One to 25 cm from each edge, in the middle
- Choose a metal drill adapted to the bars of the teeth: the holes must be wide enough to let through your 5 steel bars, but not too big to allow a good fixation during the welding
Example: For bars 10 mm in diameter, an 11 mm drill fits the bill.
- Drill the 5 holes following your marks with a drill.
- Prepare both ends of the bar with a hacksaw or a proper band saw: form a rounded to fix later the supports of the wooden handles.
3. Prepare the Teeth and the Handle Supports
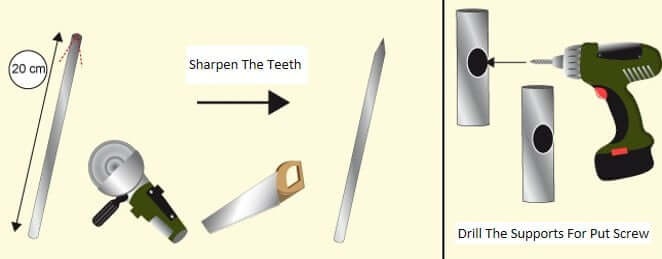
Sharpen your teeth
- Take a steel bar 20 cm long that will use as a tooth.
- With a metal grinder, sharpen one end of the bar to make it sharp, it will facilitate insertion into the ground.
Good to know: If you do not have a grinder, use a hacksaw.
- Do the same with the other 4 steel bars.
Good to know: There are broadforks with 4, 5, or 7 teeth. The most common model is the 5-tooth model.
Drill the Handles holders
- Take your two steel tubes that will serve as support.
- Drill a hole in the middle, to insert the fixing screw to hold the Handles.
Good to know: Use a drill adapted to the diameter of the screws that you will use.
4. Assemble the Teeth and Supports with the Broadfork Head
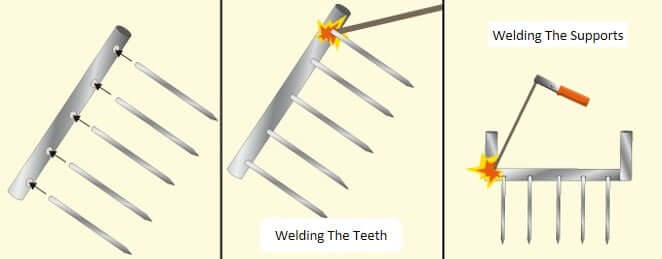
- Put your 5 teeth in the 5 holes of the hollow bar.
- Weld the five bars at the entry and exit points using the arc welding technique.
- Also, weld the two steel tubes on each side of the hollow bar.
5. Insert the Handles of the Broadfork
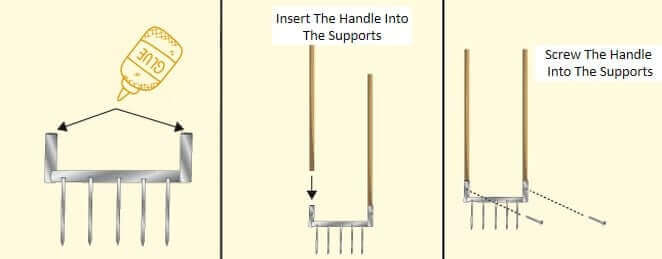
- Stick inside of the two steel tubes that are now soldered to the ends of the broadfork head.
- Insert your 2 wooden handles.
Good to know: Determine the length of your handle according to your height.
- The glue is not sufficient, fix the handles by screwing screws in the holes of the handle supports.
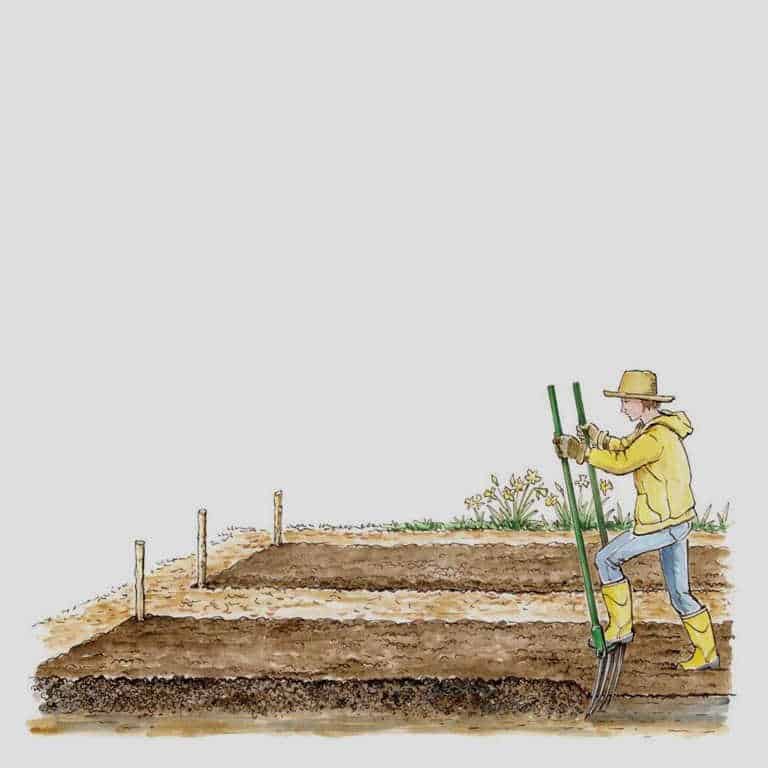
How and Why to Use a Broadfork
Your homemade broadfork is ready, you can allow air to get into the soil of your garden for your future plantations! Happy Gardening!
Pin It