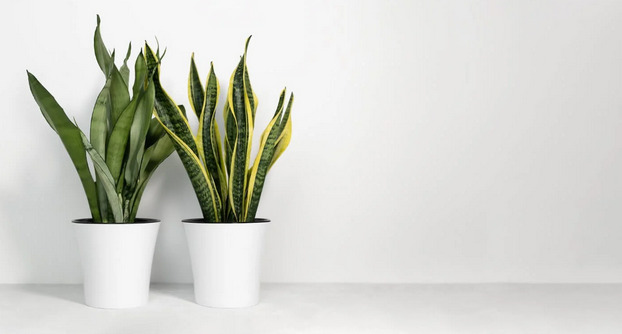
Snake plants might be excellent additions to your indoor space, but they also require an informed care approach. You have to be careful with procedures such as watering to help guarantee optimal plant development. However, you are still likely to come across various watering issues.
So, how do you save an overwatered snake plant?
The first step in saving overwatered plants is determining the damage level. If your plants have experienced yellowing but have not yet undergone wilting, it’s still possible to save them. If the wilting has started, you might have to work harder to save the plant.
Steps in Saving Overwatered Snake Plant
If you have been unfortunate enough to come across rotting snake plants, it doesn’t mean that you will lose the plant. However, you have to take a proactive approach to address the plant health issue.
Don’t think you can just ignore this issue because you have other equally important obligations in your life. You have to take immediate action in addressing the problem. If you detect the problem early enough, it will only occur around the rooting area. Contrary to what most people think, overwatering a snake plant has negative effects.
If the compilation has developed throughout the roots, the rot may have spread to other areas of the plant and even the leaves. Below is a guide on the specific ways you can use to in saving an overwatered snake plant:
Rot Around the Roots
If you come across the signs of root rot, the first step is to tip the plant out of its pot to better view the affected areas. If the surrounding soil area is soggy or wet, realize that it’s the first sign that overwatering might have occurred. Be on the lookout for any rotting components on your snake plant, which often appears with a brown and slimy appearance.
Next, you can remove the wet soil from the root section and ensure you rinse the soil well in some saltwater. The saltwater helps remove any pathogens that might hamper your plant’s growth. You should then cut the rotting sections of your plant’s roots using a pair of secateurs.
You will have to cut back each root until you get to the health section of its flesh. You should also ensure that the plant doesn’t have any signs of rotting in the root area. Once you remove all the rotten plant structures, proceed to prune the healthy roots. Doing this will encourage the plants to grow fast and aid in recovery procedures. A good suggestion for you is to address the rootball using some fungicide.
The reason is that the solution will hamper any further infections on your plant’s roots during the overwatering issue. Set the plant on a sheet of newspaper, and let it sit for a few hours so the roots can dry. Remember that snake plants are succulent, so you shouldn’t worry about wilting issues.
The final step is to perform the replating process and ensure the pot and the soil you use are of good quality. Specifically, the pot should be clean, and the soil should have sufficient water. Ensure you use a cactus mix for your re-potting. Regardless of the option you choose, ensure that the soil offers sufficient drainage for the plant.
Avoid watering your plant at this point. While the plant might still have some moisture, the plant needs a few hours of rest before you can re-start the process. Remember to provide your plant with sufficient light for growth and development. Never use old repotting soil because it can harm the development of the plant.
Advanced Rotting Issues

If you are unlucky and your plant already has experienced advanced rotting, you will have to consider a different approach. One of the best ways to determine whether the plant has experienced advanced rotting is to squeeze the leaves. Overly soft leaves should indicate that the rot has advanced to the delicate areas of your snake plants.
However, the healthy leaves tend to be firm. If the leaves have any rotting issues, ensure that you cut them off. You may have to evaluate the base of the removed leaves, so you can detect any unusual marks that indicate rotting. Cut another portion of the leaves on your plant to help detect the presence of the rot. Fortunately, the base of the leaves should no longer have any signs of rotting complications.
If there are still signs of rot, cut back again until the plant remains healthy. Also, avoid re-using the secateurs without taking them through disinfection procedures. Once you do that, cut another portion of the plants.
Severe Snake Plant Damage – Use Propagation
If the damage to your snake plant is excessive, you should accept the possibility that it might be difficult to restore the plant. The best solution for you is to take your plant through propagation procedures. The steps involved include:
Cut some healthy leaves to help kickstart the propagation process. If your plant has healthy roots, and the rot has not affected the root, then your plant is retrievable. You can repeat this process with the other leaves in your plant, which is important for its overall health. It’s a solution you use to safeguard the health of the higher areas of the plants that haven’t experienced the rot.
Set the cuttings aside in some indirect light until the incisions you made on the snake plant heal. You will notice these incisions developing corky scabs, a major sign of the healing process. While it might take days for this process to complete, it’s still important for the health of your plants. Some snake plant owners even prefer to dip the cuttings into powdered sulphur products. The reason is that such a product helps to faster the drying process and can be particularly helpful for dying plants.
When the cuttings become dry, set them into the free-draining potting mix that you had used earlier. The ideal cutting size should average about 5 inches. You can set several cuttings in a single pot with several baby plants. However, if you prefer the tree-like types, you can just set a single plant in the pot. Regardless of your choice, ensure you plant the cuttings a few inches deep into the potting mix.
A good place for you to start is to choose a suitable container for this process. Ensure the container provides sufficient drainage space and ventilation for the soil. The next step is to water the plants lightly on the top soil and set them in a position that provides indirect light. The cuttings should root fast, and now that you are aware of the plant’s requirements, nursing them back to health should be easy.
Tips for Watering Your Plants
Below are some helpful tips you can use for watering your snake plants:
- Too little is better than overwatering. When the plant is still new, avoid overwatering it because this can harm its growth. You will find it easy to retrieve an underwater plant compared to an overwatered type.
- Be careful when watering the plant during specific seasons of the year. A good example would be watering your snake plant in the winter when humidity levels tend to be high. You might have to reduce the amount of water your plant receives and ramp it up again during the winter.
- If you struggle with overwatering issues, consider watering the plant from the bottom. You can do this by setting the plant on a plate and then setting it there to absorb the water gradually. Any overflows on the plate should indicate overwatering issues. However, never leave a plant in water for more than half an hour.
- Water your snake plant only when you notice the soil is dry. You can place your finger in the soil or scoop it up using any tool you might find. However, avoid displacing the soil too much, as you might easily damage the root structure.
There are various steps involved in saving an overwater plant, and this process involves using the right re-potting techniques. You first have to identify the areas of the plants which experienced the rot issue and cut them off. You may also have to identify whether the rot has affected the entire plant, thus making it retrievable. Once you determine the plant is retrievable, cut it, and set it in a fresh batch of soil.